 Happy new year, friends! I hope that your holiday season was wonderful + that your 2012 is off to a seriously awesome start. You’re all pretty darn fantastic, so you deserve it. =)
Now, to my first 2012 post. Do you have any foods that you used to love in your childhood, but through the process of growing up + starting your own life as an adult, managed to forget? I absolutely do, + I usually don’t remember them until something triggers a nostalgic childhood food memory — reading a blog post, seeing an item on a menu or something in a store, etc.
This was exactly how i felt when I came across a post for homemade butter mints over at love and flour. Butter mints?, I thought, I used to love those things! My mom always put a bowl of butter mints out when we had dinner parties +I remember going back again + again to that bowl, filling up on those delicious, melt-in-your-mouth treats. I hadn’t thought of them in years, + certainly had no idea that you could make them so incredibly easily at home.
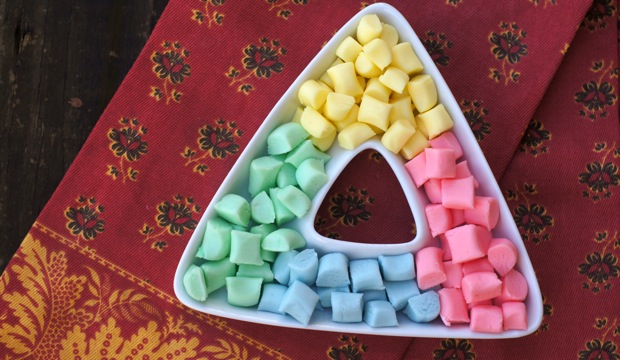
I put them on my holiday to-make list to give to family + friends, + was 100% thrilled with the results. Not only are they super easy to make, but they also turned out gorgeous. I love the different pastel colors – so reminiscent of the pretty little mints I loved as a child. And you can easily coordinate the colors to work with the color palette of any party or shower. I will absolutely be making them again — in fact, I might just have to make some more this week!
Homemade Butter Mints
makes about 80-100 small mints, adapted from my life as a mrs.
Ingredients
1/2 cup (one stick) unsalted butter, softened
5 cups powdered sugar
2 tablespoons milk
3-4 drops peppermint oil (or 1 tsp peppermint extract – i used peppermint extract)
food coloring of your choiceDirections:
In a stand mixer, beat the softened butter for 1 minute until light + fluffy. Add the powdered sugar + mix thoroughly until the mixture is dry + crumbly. Use a spatula to scrape down the sides + bottom of bowl.
Add the milk + the peppermint oil or extract. Mix thoroughly until the dough comes together + thickens. It should be very thick, not sticky, + easy to mold; similar to the texture of playdough. If needed, adjust the consistency with a drop or two of milk or a dash more of powdered sugar (*note: I didn’t need to do this – the consistency came out perfect).
Depending on how many colors you want to make, divide the dough. For example, I wanted to make four different colors, so I divided the dough into four separate pieces. Add a drop of two of food coloring to each dough portion, + mix it into the dough, either by hand or by using a stand mixer. Add more color if needed. (two drops per dough section was sufficient for me to get very pretty, pastel colors).
Lay out parchment paper on the counter + dust with powdered sugar. Break off about 1/4 cup pieces + roll into long, skinny logs (about 1/2″ thick). Slice into 1/2″ pieces with a pastry cutter or knife.
Lay out in a single layer + let dry/harden for 24-48 hours (I let mine dry for 48 hours + they were perfect).
print this recipe


 follow on pinterest
{ 51 comments… read them below or add one }
← Previous Comments
Hi Debbi! What type of favor container? If it’s air-tight, they should keep for at least a week. But if it’s not airtight, like a chinese takeout container, they may not keep quite as well, although I’ve never tried them in that type of container.
← Previous Comments
{ 4 trackbacks }